How to Assemble Husky Garage Shelves
To assemble Husky garage shelves, lay the posts flat, slide each shelf beam onto the posts, and tap the connectors home before standing the unit up. Level the feet, anchor the rack to the wall, and load the bottom shelves first.
On this page (10 sections)
- What comes in a Husky shelving box?
- What tools do you need before you start?
- How do you lay out and seat the posts?
- How do you fit the shelves at the right heights?
- How do you stand the unit up safely?
- How do you level the rack on a garage floor?
- Should you anchor the shelves to the wall?
- How do you load and care for the shelves?
- What should you check before the first load?
- How do you assemble Husky garage shelves without mistakes?
To assemble Husky garage shelves, lay the posts flat on the floor, slide each shelf beam onto its posts, and tap the connectors until they seat. Then stand the unit up, level the feet, anchor it to the wall, and load the bottom shelf first.
The job is mostly sorting and sequencing. Get the parts in order and the frame goes together in under an hour, with no cutting and no complicated hardware.
What comes in a Husky shelving box?
A Husky shelving carton holds four corner posts, the shelf beams for each level, wire or steel shelf decks, and a bag of connectors or bolts. Some models add feet, casters, or a top shelf panel.
Lay everything out before you start. Group the four posts by length so you don't mix a front with a back, then stack the shelf beams in the order you'll fit them.
Check the pack against the parts list in the instructions. Missing connectors are the most common reason a build stalls halfway, so count them first.
Keep the carton flat under the parts to protect the floor and the finish. A soft surface also stops the posts from rolling while you work.
What tools do you need before you start?
You need a rubber mallet, a screwdriver for any bolted joints, and a level. A tape measure helps you set shelf heights evenly, and a stepladder matters once the unit stands tall.
A mallet seats connectors without denting the steel. Use a block of wood between the mallet and the finish if the metal marks easily.
A spirit level tells you whether the floor or the feet are the problem. A long level across two shelves catches twist that a short one misses.
Why a laser measure speeds up the layout
Set shelf heights with a laser measure so every level matches across the wall. The RockSeed meter reads distance, area, and volume, and its two bubble levels help you keep the tool square.
It switches between meters, inches, and feet, which helps when the instructions list heights in one unit and your tape reads another. The backlight suits a dim garage corner.
It stores 20 groups of readings, so you can note each post position without writing them down. The IP54 rating covers dust and splashes in a workshop.
How do you lay out and seat the posts?
Stand the four posts upright in their final footprint first, or lay them flat in a rectangle, then check the spacing against the instructions. Matching the corners before you add shelves prevents a twisted frame.
Working flat is easier for one person. Lay two posts parallel at the shelf width, fit the beams for the bottom level, then add the other two posts.
Push each beam end onto its post until the tab or connector clicks or seats fully. If a connector binds, lift the beam slightly and try again rather than forcing it.
A quick tap with the mallet finishes the seat. Don't hammer hard enough to bend the tab, because a bent connector won't hold the shelf square.
How do you fit the shelves at the right heights?
Fit the bottom shelf first, then work upward, measuring from the floor to the same point on each post. Even spacing gives you room for tall totes on one level and shallow bins on another.
Mark both front posts at the same height before you fit a beam. Repeat on the back posts so the shelf sits flat, not on a slope.
Seat the shelf deck or wire panel on the beams and press it down at the corners. A deck that rocks means one beam is a notch off.
Check each level with the level as you go. Fixing a high corner now is easier than discovering the lean once the rack is loaded.
Where do the connectors and bolts go?
Push the connector into the post slot and the beam end over it, or line up the bolt holes if your model uses bolts. Tighten bolts only after all four corners of that shelf are in place.
Bolted joints let you snug the frame square before the final turn. Run the bolts finger tight first, check the level, then tighten them evenly.
Don't overtighten. Steel posts can crush at the hole and the joint loses its grip.
How do you stand the unit up safely?
Tip the finished frame up with two people when it's tall, keeping the base from sliding. Lift from the middle of the top beam and walk it upright in one motion.
Clear the floor path first. A 72-inch rack is awkward to steer once it's moving, and a dropped frame can bend a post.
Set the unit against its wall position before you let go. Leave a small gap for the anchor brackets and the wall surface.
If you're building alone, keep the frame low and lift one end at a time. Stop and ask for help if the top starts to swing.
How do you level the rack on a garage floor?
Turn the leveling feet until the frame sits flat and plumb, checking side to side and front to back. Concrete garage floors often slope toward a drain, so one corner may need more turns than the others.
Start with the front feet, then the back. Recheck the top shelf after each adjustment, because raising one corner tilts the whole frame.
A rack that rocks means a foot is too short. Extend that foot until all four carry weight.
Skip leveling and the shelves lean, totes slide, and the anchor brackets fight the frame instead of holding it.
Should you anchor the shelves to the wall?
Yes, anchor a tall Husky rack to the wall when the instructions call for it. A 72-inch unit with a loaded top shelf can tip forward if someone pulls on it.
Find the wall studs first. A bracket screwed into a stud holds far better than one in hollow drywall.
For hollow walls, use a rated toggle anchor and follow its load limit. The KURUI set covers 1/8 in, 3/16 in, and 1/4 in sizes with steel toggle bolts and wing nuts.
KURUI says the butterfly wings spread behind the wall to add contact area. The holding strength still depends on wall thickness and a correct install.
The set suits light shelving brackets and wall fittings. KURUI doesn't recommend it for televisions or heavy ceiling mounts, so keep wall shelves within its stated use.
How do you load and care for the shelves?
Put heavy totes on the bottom shelf and light items up top, keeping weight spread across each level. A rack loaded top heavy is the one most likely to tip.
Check the shelf rating in your model's manual. A five-shelf wire unit in this class carries about 350 pounds per shelf when the load is even.
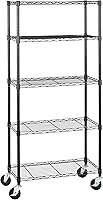
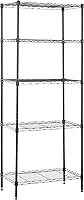
Wipe the posts and decks with a dry cloth now and then. A wire rack like the Amazon Basics unit needs no tools to assemble and offers adjustable shelf heights in 1-inch steps.
Its four leveling feet steady the frame on a sloped floor, and the total capacity is 1,750 pounds. The 36 x 14 x 72 inch footprint suits a garage wall.
Use it as a reference point if your Husky rack is similar in size. Both types load the same way: heavy low, light high, weight spread evenly.
If your plans change and you want to move the unit around, compare garage shelves on wheels before you bolt it down. For bin-heavy storage, see garage shelves for totes.
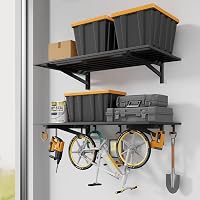
Wall units go up differently, so read how to hang garage shelves first.
What should you check before the first load?
Shake the empty frame gently and look for movement at the connectors and feet. A wobble now means a loose connector or an unlevel foot, not a shelf that needs more weight.
Walk around the unit and check every joint seated fully. Recheck the anchor brackets and the wall fixings with a firm pull.
Confirm the shelves sit level and the anchor screws are snug. Then load the bottom shelf and work up.
Keep the manual and any spare connectors in a bag taped to the back of the rack. Future height changes go faster when the parts stay with the unit.
How do you assemble Husky garage shelves without mistakes?
The reliable order for how to assemble Husky garage shelves is sort, lay flat, seat the shelves, stand up, level, anchor, load. Most build problems trace back to a skipped step in that sequence.
Start with a parts count and a clear floor. Seat every connector fully before you tip the frame up.
Level the feet before anchoring. Then fix the rack to the wall and load the bottom shelf first.
For matching shelf heights across a long wall, the RockSeed laser measure saves time. For hollow-wall anchor brackets, keep the KURUI toggle set within its stated light-duty use.
Do those steps in order and the rack should stand square and hold its load.
Frequently asked questions
Do you need tools to assemble Husky garage shelves?
Most Husky steel shelving goes together with a rubber mallet and your hands. The posts have slots and the shelf beams have tabs or connectors that seat into them.
Check the instructions packed with your model, since a few units use bolts for the top shelf or the posts.
How long does it take to put up Husky garage shelves?
Plan about 30 to 60 minutes for a single unit with one helper. Sorting the parts and clearing the floor takes the longest.
Standing the frame and seating the shelves goes quickly once the posts are laid out in order.
Can one person assemble Husky garage shelves alone?
You can build most units alone if you assemble them lying down and tip them up at the end. A second person makes the upright step safer on tall racks.
Ask for help lifting anything you can't control with one hand.
How much weight can each shelf hold?
The limit depends on your model, so follow the label or manual that came with the rack. A five-shelf wire unit in this class is rated around 350 pounds per shelf when the weight is spread evenly.
Keep heavy totes low and never exceed the stated total.